
 The panel has complete instructions, to help you create this wonderful doll; however, here are a few helpful hints to assist you in some of the sewing steps:
After you cut out the doll pieces, fold the right sides together of the doll body so you can sew the dart along the lines on the panel piece.

Press the dart and repeat for the back doll body. Place the front and back pieces, right sides together, and stitch, leaving the arm openings and leg openings unstitched, as indicated on the panel pieces.

Place the arm pieces right sides together, and stitch, leaving the top open.

Clip between the fingers, being careful not to clip the stitches.
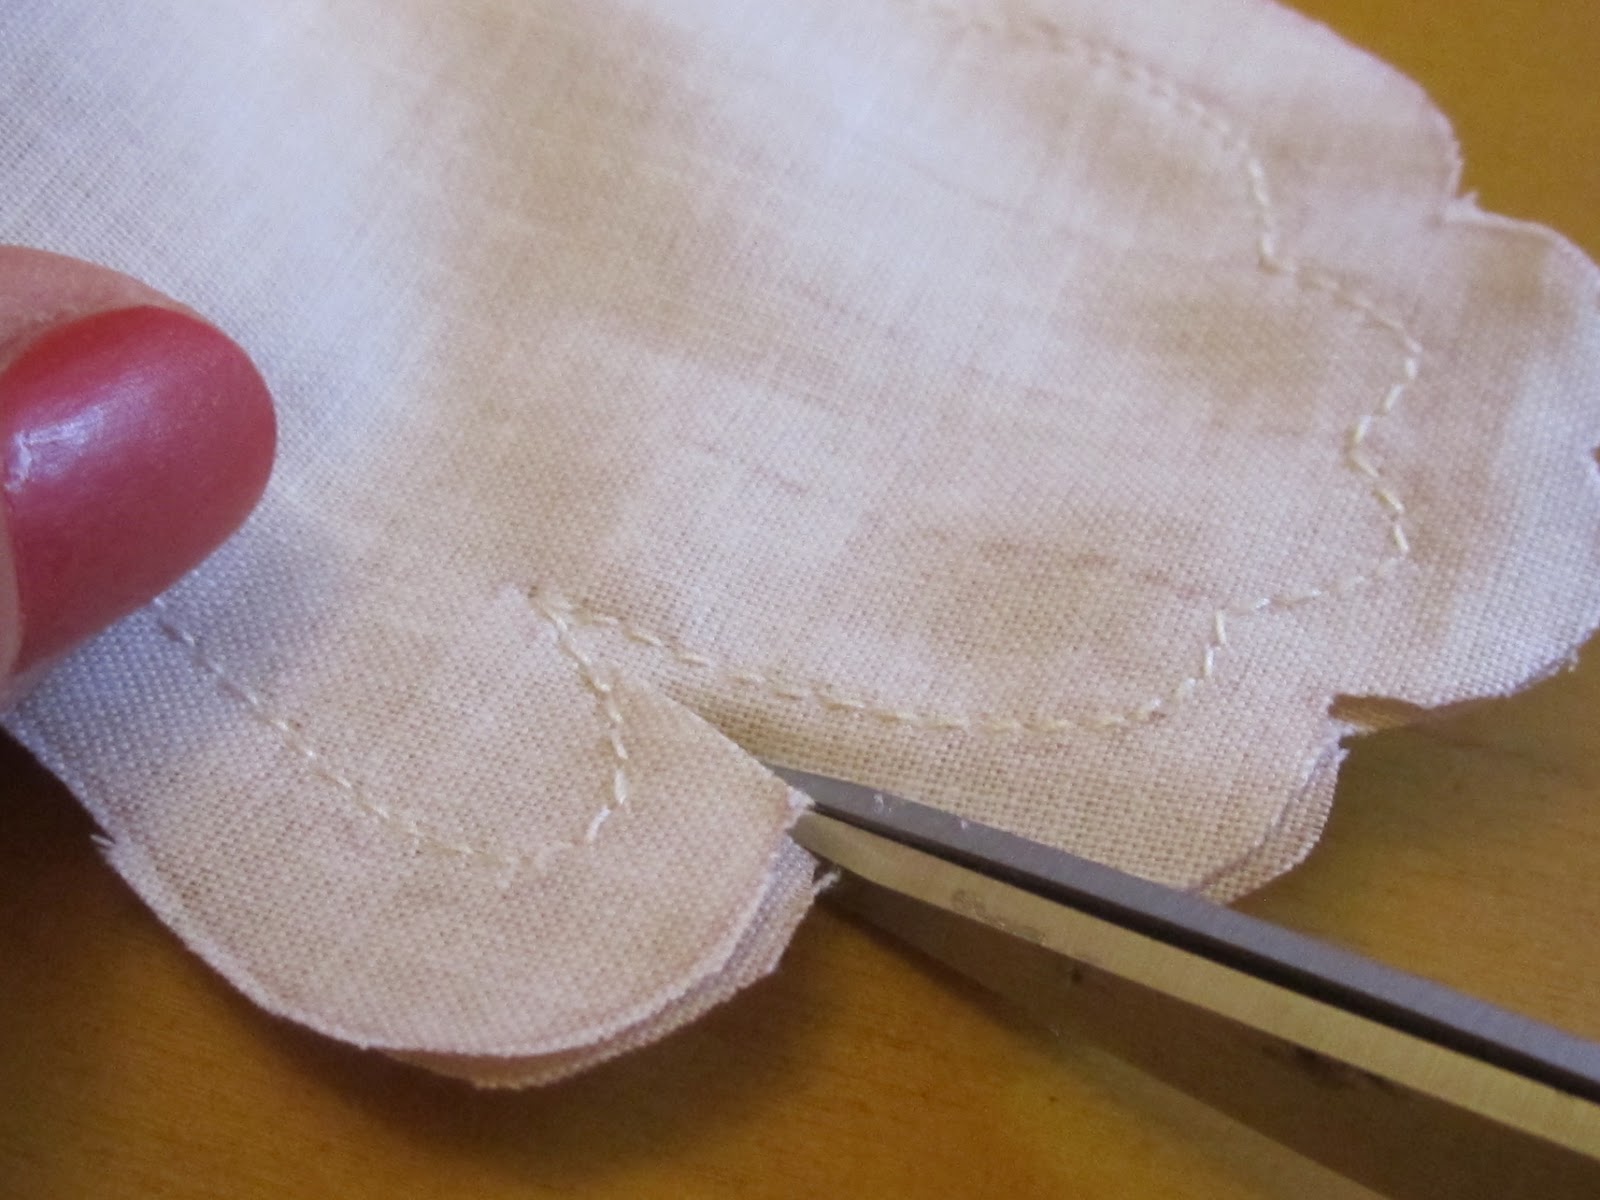
Turn the hand right side out and top-stitch the fingers as noted on the panel pieces.

Cut chenille stems so that you can fold them in half and fit them inside the fingers, extending from the fingers about 1/8".

Insert the folded stems into the fingers, and when the fingers are all filled with chenille, you can bend them slightly to look more real. Now, finish stuffing the lower arm, to within about 1" of the dotted elbow line.

Note: the side seams of the arm are lined up so they are on top of each other, and the arm will bend more like a real elbow. Stitch across the arm and finish stuffing the top, leaving the last 1" unstuffed.

Now, you will insert the arm into the body, while it is wrong side out. Baste the arm so you can check to make sure the arm is facing the right direction when you turn the body right side out! Another way to check is to make sure the arm which is labeled 'right arm' is inserted into the 'right' arm hole. When you have it right, stitch the arm into the body seam, through all layers. Repeat for the other arm and turn the body right side out.
Now, to tackle the legs! Place the leg pieces with right sides together, and stitch the front and back seams.

Clip the bottom edges of the foot, noting the panel piece.

Fold the bottom of the foot in half, and line up the folds with the front and back seams of the leg.


Stitch together, turn right side out and stuff the bottom part of the leg (to within 1" of the knee line).

You remember how you did the arm? Well, it's the same drill for the leg. Just remember to line up the front and back seams, as you did before. Stuff the rest of the leg, up to within 1" of the top, and get ready to stitch the legs to the body. It may be helpful to baste the openings of the legs together at the top. Once you do that, place the right sides of the leg front to the right side of the body, lining up the raw edges. Pin, then stitch just to the front of the body. Once you stitch it, you can stuff the body firmly, then stitch the opening closed.
To finish the head, stitch the back pieces right sides together, leaving the opening.
Place the front of the head and back right sides together, and stitch around the entire head. Turn through the opening, and stuff firmly. If you don't stuff enough, you will have wrinkles, like the one below:

You will need to stuff the head firmly, until the 'wrinkles' around the chin and head are more rounded.

Note the top of the neck of this doll's body. It is too flat, and if a doll's head is sewn to this neck, the head will flop back and forth. To fix that, add more stuffing!


These two photos of the doll's head show the front and back of the finished doll. Pin the head in place first, then start stitching at the back of the head and neck, and as you get to the chin area, the needle will be inserted into the doll's head, then into the top of the torso, in an in-and-out motion. I usually go around the entire head twice, to make sure the head is secured.

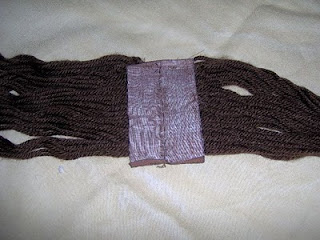
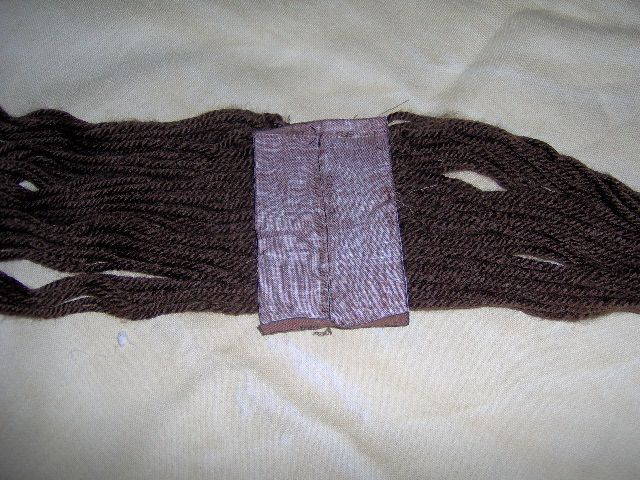
These two photos are illustrative of the technique used to create the doll's yarn 'hair.' Note the panel for measurements, and stitch the yarn to the brown rectangle used for the base. You will see both sides in the above photos. Note: When you are through winding the yarn onto the cardboard, cut one side of the yarn to release it from the cardboard, and center it on the rectangle before stitching.

Place the hair onto the doll's head, centering the 'part' and folding the raw edge of fabric under. Add glue to the top section of the head, and press the hair in place until the glue sets up. Note: I use hot glue, but if you aren't an old hand, you can burn yourself easily. In that case, use a fast-setting tacky glue (I love Aleene's silver bottle), and give it more time to dry before you go to the braiding step.

This is the back view. Make sure you cover all the back of the head, and glue the sides in place as well.

Braid the hair, and tear some strips of the matching fabric (1" wide) to make some little bows for the end of the braid!
Now, stitch up the pantaloons and petticoat, then choose some wonderful new clothes for your Malinda doll! Malinda was my great grandmother, a Confederate woman from Virginia.

Note the top of the neck of this doll's body. It is too flat, and if a doll's head is sewn to this neck, the head will flop back and forth. To fix that, add more stuffing!


These two photos of the doll's head show the front and back of the finished doll. Pin the head in place first, then start stitching at the back of the head and neck, and as you get to the chin area, the needle will be inserted into the doll's head, then into the top of the torso, in an in-and-out motion. I usually go around the entire head twice, to make sure the head is secured.

These two photos are illustrative of the technique used to create the doll's yarn 'hair.' Note the panel for measurements, and stitch the yarn to the brown rectangle used for the base. You will see both sides in the above photos. Note: When you are through winding the yarn onto the cardboard, cut one side of the yarn to release it from the cardboard, and center it on the rectangle before stitching.

Place the hair onto the doll's head, centering the 'part' and folding the raw edge of fabric under. Add glue to the top section of the head, and press the hair in place until the glue sets up. Note: I use hot glue, but if you aren't an old hand, you can burn yourself easily. In that case, use a fast-setting tacky glue (I love Aleene's silver bottle), and give it more time to dry before you go to the braiding step.

This is the back view. Make sure you cover all the back of the head, and glue the sides in place as well.

Now, stitch up the pantaloons and petticoat, then choose some wonderful new clothes for your Malinda doll! Malinda was my great grandmother, a Confederate woman from Virginia.